
Wall Digital Clock with additional features
The start
This project was started with one main purpose - to meet certain technical specifications, required by my son. The purpose is using the electronic parts we have at home and to build a precisely working digital wall clock. Because I am going to use a microcontroller, I could add some extra features as some "animations", temperature measuring, displaying of some additional information, etc. And the biggest challenge will be the using of 7-segment displays. They are not perfect for any advanced displaying, as you know. We will see (-:
I have decided to realize this project in different way. Usually the peopble sharing theirs projects on the web, make video sequences during entire project. After that they edit the videos, photos and the text and finally they publish everything on the web.
I am going to publish my project step by step, with the pace I really do it. And because this is a hobby project, the speed will not be somehow fascinating or amazing (-:
And the zero step is an electronic parts inspection - what we have at home (-:
Home store inspection
- DS1307 I2C Real-time clock 1 pc.
- Some different PICAXE microcontrollers (PICAXE-08M2, PICAXE-14M2, PICAXE-18M2, PICAXE-20M2, PICAXE-20X2 (PIC18F14K22).
- D2301 7-segment displays 6 pcs.
- ...
22/09/2018
The first step
As a first step of my design process I need to create the block diagram of the clock. I think about it as an universal information panel.
So, the most important part is the microcontroller. It has to ensure sufficient number of outputs for addressing of every one segment of every one digit separately. To be able to light up a random number of segments of everyone digit at the same time I will use eight outputs. One for every segment and one more for the dot. My idea is to scan the digits from left to right. In other words only one digit will be switched on in a certain moment. This allows me to use 3-to-8 Line Decoder and to save outputs this way. There will be three outputs for six digits addressing (see the block diagram below). I have decided to use PICAXE-20M2 microcontroller. It has twenty pins. This is useful, because I will need some more pins for connection to the real time clock via I2C, to the thermistor for eventual thermometer etc.

07/10/2018
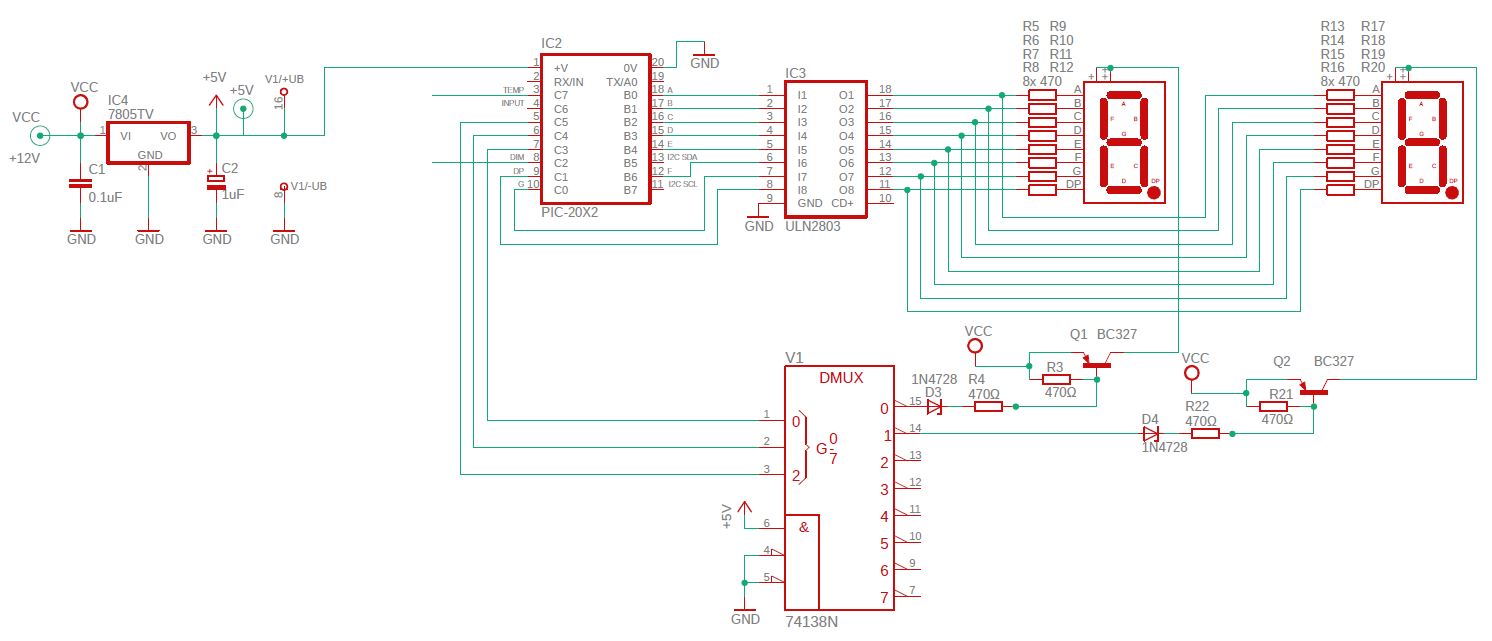
Electronic design start
This weekend I have started the work on the electronic design of my clock. The scheme below is not finished.
22/11/2018
Electronic design almost finished
Today I have finally finished the electrical design of the more complicated PCB1 (with the microcontroller). The exact type of some of the parts will be chosen later.
Here it is:
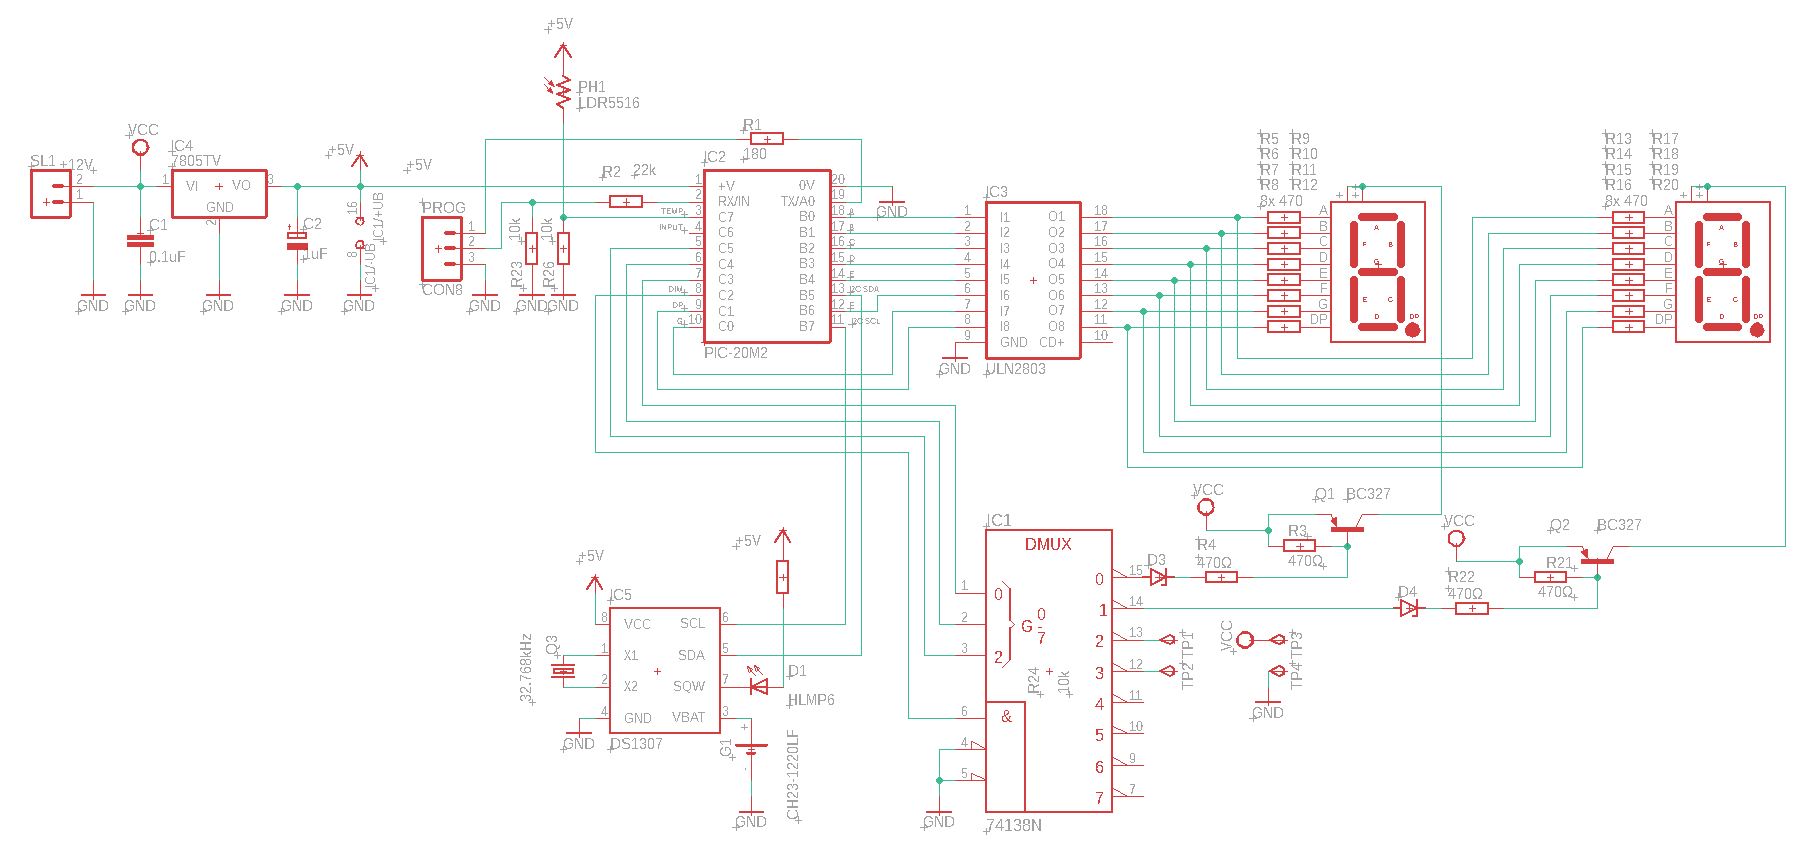
Well, go to the layout design (-:
13/12/2018
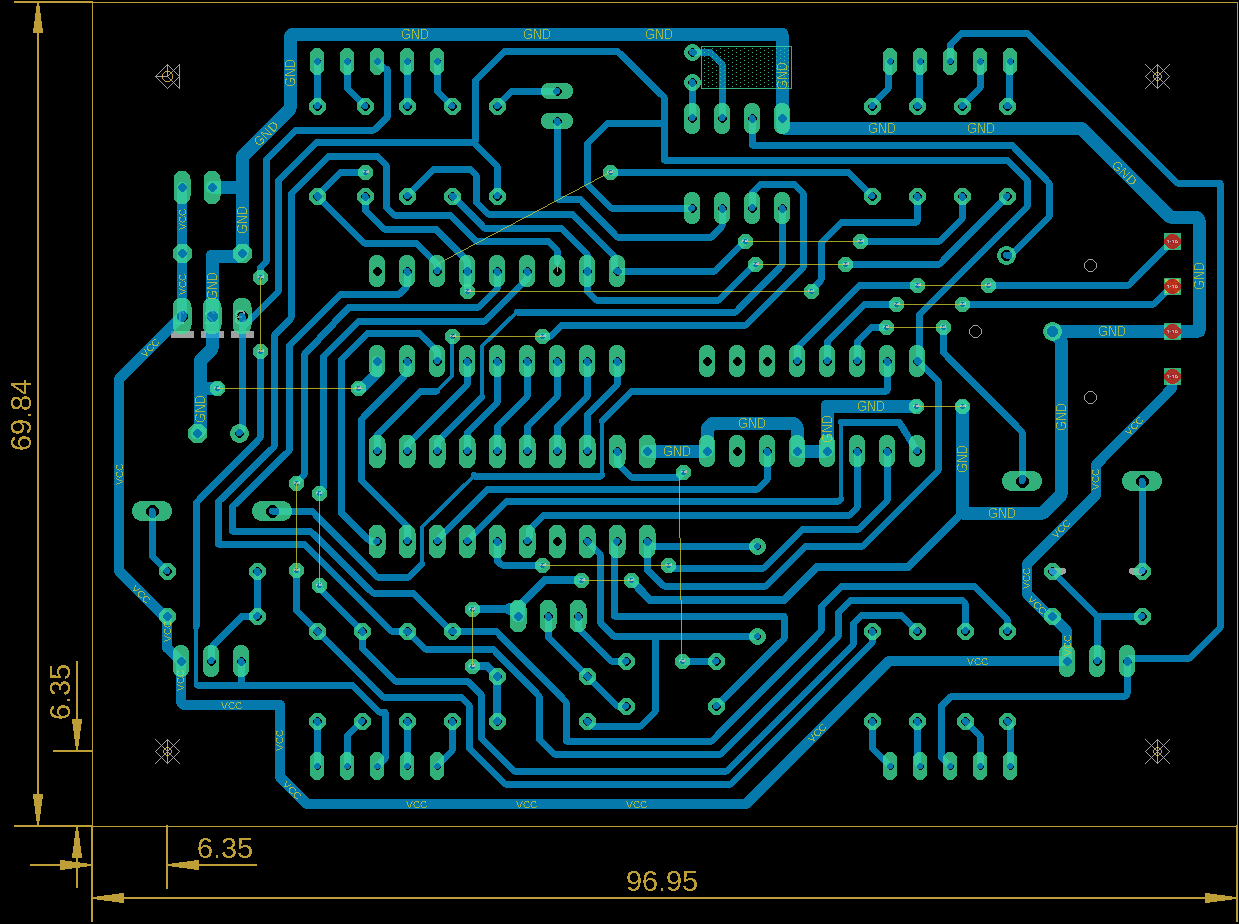
PCB layout almost finished
Hi guys, I have worked on the first of two PCBs layout and now I am very close to the finish. Thin yellow wires are actually air connections. I realize them as wire bridges on the PCB. This allows me to use one layer PCB.
You can taste it:
29/12/2018
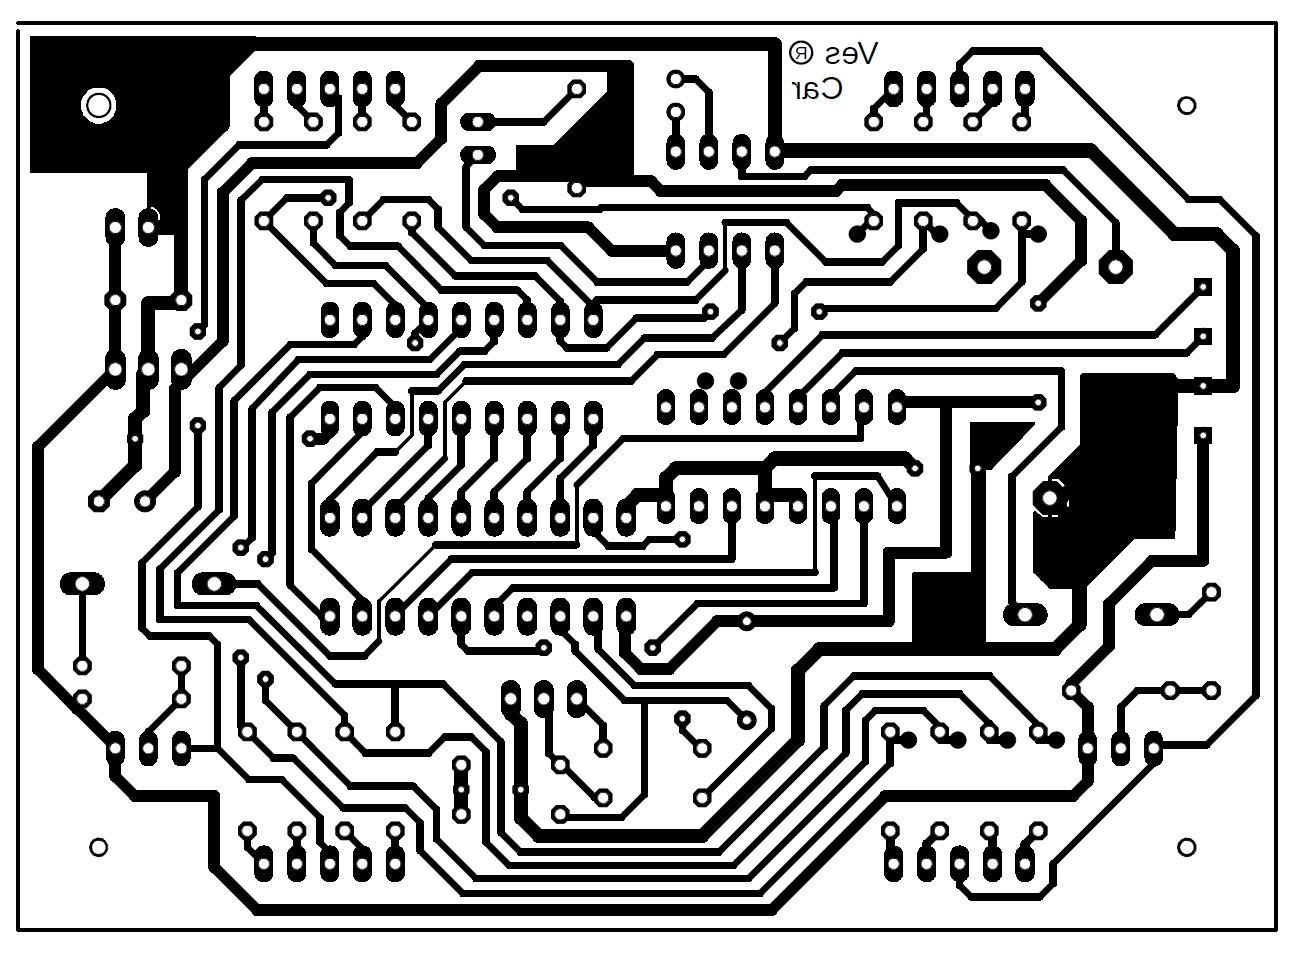
PCB1 negative has been finished
Hi again. Here is the finished negative of the PCB1:
01/01/2019
PCB1 soldering
Hi there,
Finally I have finished the PCB1 (with the microcontroller). Now I have to write the firmware. But this will take some more time (-: You can see some pictures from the PCB soldering process and a short video with the first firmware tests as well.

24/01/2019
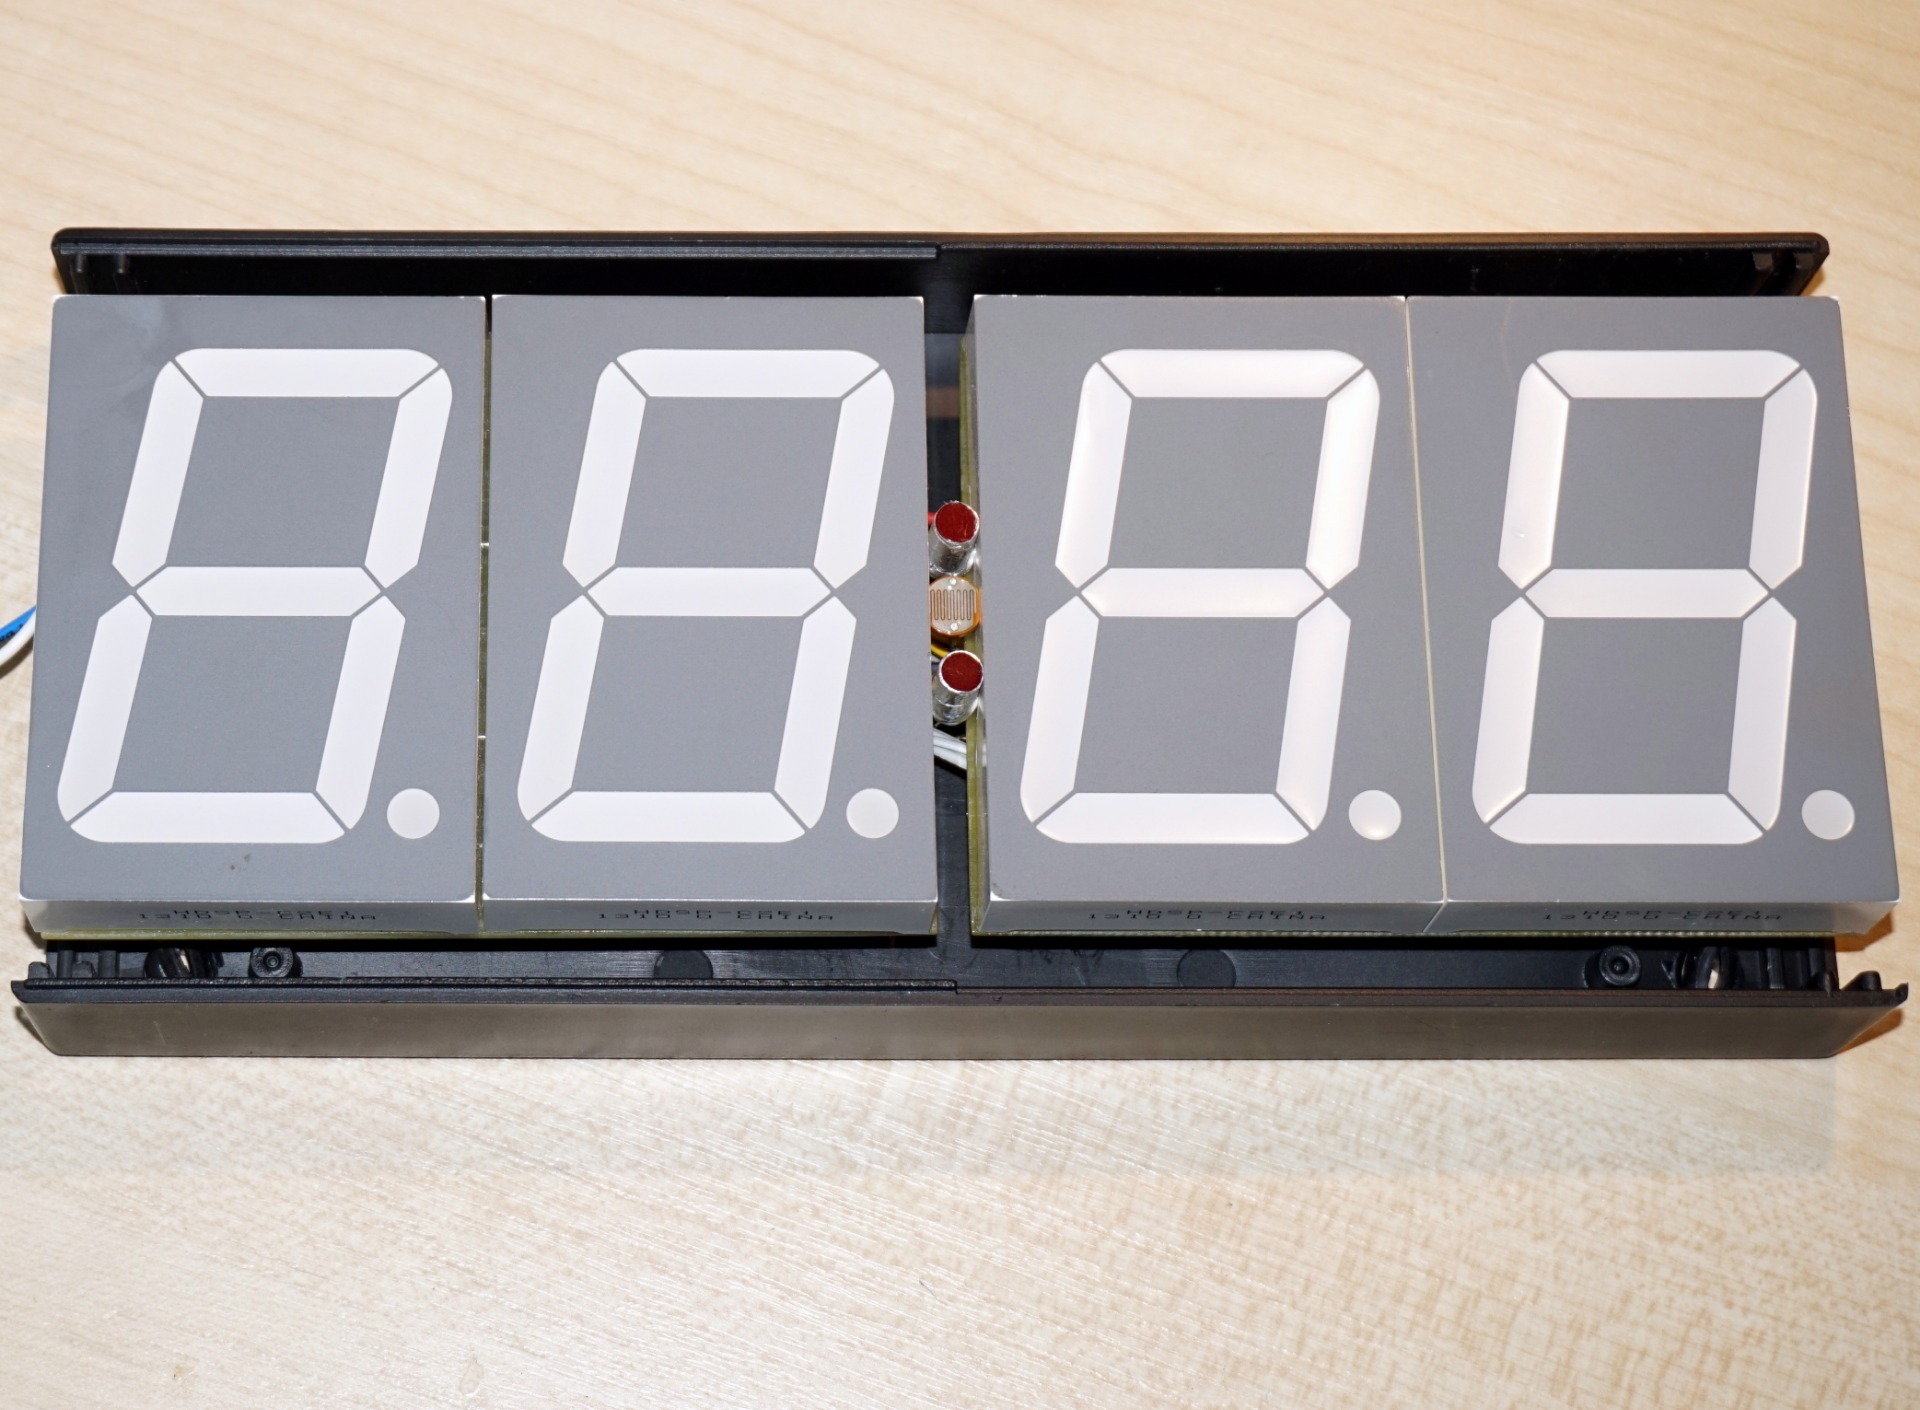
First version with two digits only
Hi again,
I was not able to wait and wrote a temporary version of the clock with two digits only. In this version I show the hours, minutes and seconds part by part.
What I did more, was the Dim effect. The brightness of the digits depends of the ambient lighting. For now it is in two steps only. But, because I use an analog input, it is possible to make the brightness of the digits to follow the ambient light intensity fluently.
04/02/2019
First proper work
Hi my friends,
Finally I have finished the HW of the project, or almost (-:

And once again with animation (-:
09/03/2019
The work finished
Hi everybody,
After few months, the wall clock was born ((-: It was a long journey, but the result was worth it. Finally, we have a nice wall clock. I love the design which is 100% improvisation. No plans, no drawings. Only hand work.
... and some pictures.
